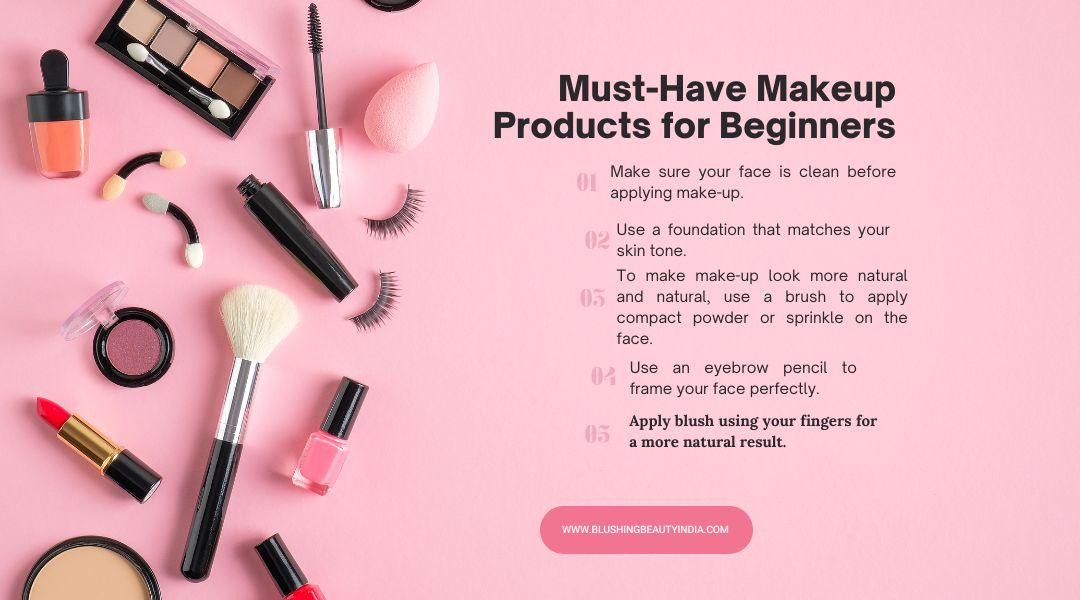
Must-Have Makeup Products for Beginners Are you new to the world of makeup and feeling a bit overwhelmed by the plethora of products available in the market? Fret not! We’re here to guide you through the essential makeup products every beginner should have in their collection.
Whether you’re looking for a flawless everyday look or gearing up for a special occasion, these makeup essentials will be your trusted companions on your beauty journey.
1. Primer: The Foundation for a Flawless Look
- In the world of makeup, achieving a flawless look is the ultimate goal. Whether you’re a makeup enthusiast or a professional artist, you know that the key to a flawless finish lies in the primer. Primer: The Foundation for a Flawless Look is not just a product; it’s a game-changer in the beauty industry.
- In this comprehensive guide, we will delve deep into the world of primers, exploring what they are, how to use them effectively, and why they are the secret to a seamless makeup application. Get ready to transform your makeup routine and achieve that flawless look you’ve always dreamed of.
The Basics of Primer-
Understanding Primer-
- Primer, in the context of cosmetics, is a preparatory product applied to the skin before makeup. Its primary function is to create a smooth and even canvas for makeup application. But it does much more than that. Primer: The Foundation for a Flawless Look also helps in improving makeup longevity and can address various skin concerns.
Types of Primers
Mattifying Primers:- Ideal for oily skin, these primers control excess shine and keep makeup in place all day.
Hydrating Primers:- For those with dry skin, hydrating primers provide a moisture boost, preventing makeup from looking cakey.
Colour-Correcting Primers: -These come in various shades to neutralize skin imperfections like redness or sallowness.
Pore-Minimizing Primers: -Perfect for minimizing the appearance of pores, leaving skin looking smooth.
Illuminating Primers: -These add a radiant glow to your skin, making it perfect for a dewy finish.
Applying Primer
To get the most out of Primer: The Foundation for a Flawless Look, follow these steps:
- Start with a clean and moisturized face.
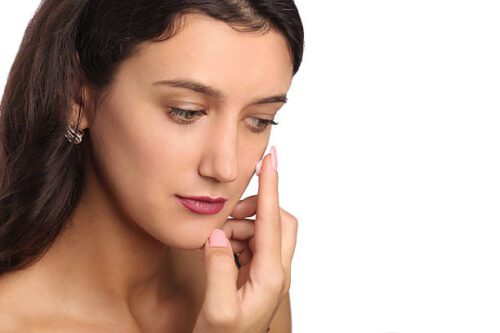
- Take a small amount of primer and apply it evenly across your face, focusing on areas with visible pores or imperfections.
- Gently massage the primer into your skin using upward and outward motions.
- Allow the primer to set for a minute before applying the foundation.
The Magic of Primer
- Enhancing Makeup Longevity
- One of the primary benefits of using a primer is its ability to make your makeup last longer. Primer creates a barrier between your skin and makeup, preventing oils and sweat from breaking down your foundation. This means fewer touch-ups throughout the day, keeping your flawless look intact.
Smoother Application
- Primer: The Foundation for a Flawless Look creates a smooth and even surface for makeup application. It fills in fine lines, blurs imperfections, and evens out skin texture. As a result, your foundation glides on effortlessly, giving you that airbrushed finish.
Addressing Skin Concerns
- Different primers cater to various skin concerns. If you have redness, a green-tinted primer can neutralize it. For uneven skin tone, opt for a colour-correcting primer. The versatility of primers makes them a must-have for anyone looking to address specific skin issues.
Choosing the Right Primer
Skin Type Matters
- Your skin type plays a significant role in selecting the right primer. Always choose a primer that suits your skin’s needs. If you have combination skin, consider using different primers for different areas of your face.
Consider Your Makeup Look
- The type of makeup look you’re going for also influences your primer choice. A dewy look pairs well with an illuminating primer, while a matte finish requires a mattifying primer.
Read Reviews and Test
- Before committing to a primer, read reviews from reliable sources and test the product on a small area of your face. This helps ensure that the primer works well with your skin and doesn’t cause any adverse reactions.
2. Foundation: Creating a Beautiful Canvas
- When it comes to makeup, the foundation is aptly named because it’s the cornerstone of creating a flawless look. Foundation: Creating a Beautiful Canvas is not just about covering imperfections; it’s about enhancing your natural beauty and providing a smooth, even base for the rest of your makeup.
- In this comprehensive guide, we will explore the world of foundations, helping you understand how to select the right one for your skin type and how to apply it like a professional makeup artist. Get ready to embark on a journey to a more beautiful you.
The Importance of Foundation
What is a Foundation?
- The foundation is a makeup product that’s designed to even out your skin tone, cover blemishes, and create a smooth canvas for the rest of your makeup. It comes in various forms, including liquid, cream, powder, and stick. The key is to choose the one that suits your skin type and desired finish.
Types of Foundations
- Liquid Foundation: This versatile option works for most skin types and provides a natural finish.
- Cream Foundation: Ideal for dry skin, it offers excellent coverage and hydration.
- Powder Foundation: Great for oily skin, it provides a matte finish and controls shine.
- Stick Foundation: Convenient and portable, it’s perfect for touch-ups throughout the day.
Choosing the Right Foundation
Understanding Your Skin Type
- Before selecting a foundation, it’s crucial to know your skin type:
- Oily Skin: Look for oil-free or matte foundations.
- Dry Skin: Opt for hydrating or cream foundations.
- Combination Skin: Choose a foundation that suits the needs of different areas of your face.
Finding Your Undertone
- Your skin undertone—whether it’s warm, cool, or neutral—determines the foundation shade that will best complement your complexion. Understanding your undertone is essential for a seamless match.
Testing Shades
- When shopping for foundation, it’s advisable to test shades on your jawline or wrist to find the one that disappears into your skin. Natural light is the best for colour matching.
Applying Foundation Like a Pro
Start with a Clean Canvas
- Always begin with a clean, moisturized face. Use a gentle cleanser and a suitable moisturizer before applying the foundation.
Use the Right Tools
- Invest in quality makeup brushes or sponges for smooth application. Brushes work well for liquid and cream foundations, while sponges are ideal for blending.
The Application Process
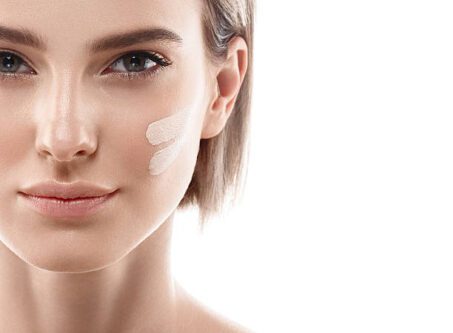
- Dispense a small amount of foundation on your hand or a makeup palette.
- Dab it onto your face in dots or lines, focusing on your forehead, cheeks, nose, and chin.
- Blend the foundation using gentle, upward strokes, working from the centre of your face outward.
- Don’t forget to blend into your jawline and neck for a seamless look.
- Set Your Foundation
- To ensure your foundation stays in place, set it with a light dusting of translucent powder. This step also helps control excess shine.
3. Concealer: Banish Imperfections
- In the world of beauty, achieving flawless skin is a common desire. Whether you’re dealing with blemishes, dark circles, or redness, concealer is your secret weapon to banish imperfections. “Concealer: Banish Imperfections” is not just a catchy phrase; it’s a reality for makeup enthusiasts and professionals alike.
- In this comprehensive guide, we will dive deep into the world of concealers, helping you understand how to choose the right one for your needs and apply it effectively to achieve a flawless complexion.
The Power of Concealer
What is Concealer?
- Concealer is a makeup product designed to cover specific imperfections on your skin. It comes in various forms, including liquid, cream, stick, and even in different shades to match your skin tone. Whether you’re dealing with acne scars, under-eye circles, or redness, concealer can work wonders.
Types of Concealers
- Under-Eye Concealer: Formulated to brighten and hide dark circles, this type often has a lightweight texture.
- Blemish Concealer: This concealer is slightly thicker and provides extra coverage for pimples and acne scars.
- Color-Correcting Concealer: These come in various colours (like green for redness and peach for dark circles) to neutralize specific skin issues.
- Highlighting Concealer: Ideal for adding brightness to certain areas of the face, like the tops of cheekbones.
Choosing the Right Concealer
Identifying Your Needs
- Before selecting a concealer, it’s essential to identify the imperfections you want to conceal. Different concealers are tailored for specific concerns.
Matching Your Skin Tone
- Concealer shades should match your skin tone or be slightly lighter. Testing on the back of your hand or jawline under natural light can help you find the perfect match.
Consider the Texture
- The texture of the concealer matters. Thicker concealers provide more coverage, while lighter ones are suitable for under the eyes. Choose based on your needs.
Applying Concealer Effectively
Prep Your Skin
- Start with a clean, moisturized face. Apply your regular skincare products before using concealer.
Using the Right Tools
- Fingers, makeup brushes, or makeup sponges can be used to apply concealer. Choose what works best for you.
The Application Process
- Dot or swipe concealer directly onto the imperfection you want to cover.
- Gently pat and blend the concealer using your chosen tool until it seamlessly blends with your skin.
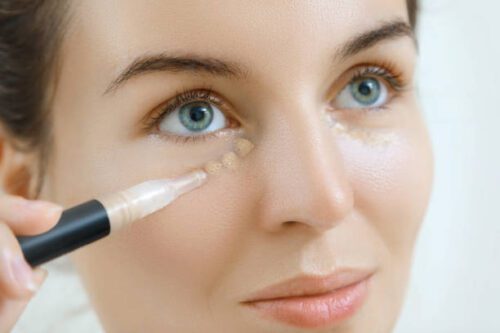
- For under-eye concealer, apply in a triangular shape with the base along your lower lash line and blend.
Set the Concealer
- To prevent creasing and ensure long-lasting coverage, set your concealer with a light dusting of translucent powder.
4. Setting Powder: Locking in Your Look
In the world of makeup, setting powder is the unsung hero that keeps your look flawless all day. “Setting Powder: Locking in Your Look” isn’t just about dusting your face; it’s about the art of preserving your makeup masterpiece. In this comprehensive guide, we will delve into the realm of setting powders, helping you understand how to choose the perfect one for your skin type and makeup style. Get ready to master the art of a long-lasting makeup look.
The Power of Setting Powder
What is Setting Powder?
- Setting powder is a makeup product that’s designed to lock in your foundation and concealer, keeping them in place for hours. It comes in various forms, including loose powder and pressed powder, to cater to different preferences.
Why Use Setting Powder?
- Setting powder is essential for several reasons:
- Controls Shine: It prevents excess shine, especially in the T-zone, giving your skin a matte finish.
- Enhances Longevity: It helps your makeup stay put, reducing the need for touch-ups throughout the day.
- Smooths Finish: Setting powder can blur fine lines and pores, giving your skin a smoother appearance.
- Sets Concealer: It prevents creasing in the under-eye area, ensuring your concealer stays flawless.
Choosing the Right Setting Powder
Consider Your Skin Type
The first step in choosing the right setting powder is to consider your skin type:
- Oily Skin: Opt for oil-absorbing, mattifying setting powders.
- Dry Skin: Choose setting powders with hydrating ingredients to prevent a cakey appearance.
- Normal/Combination Skin: You have more flexibility but can still benefit from a setting powder that offers a natural finish.
Translucent vs. Tinted
- Setting powders come in two main varieties: translucent and tinted. Translucent powders are colourless and work for all skin tones, while tinted powders can help to further colour-correct or add a touch of warmth to your makeup.
Loose vs. Pressed
- Loose-setting powders are finely milled and offer a more lightweight, airy finish. Pressed powders are compact and convenient for on-the-go touch-ups. Choose based on your preference and lifestyle.
Applying Setting Powder Effectively
Timing Matters
- Apply setting powder after you’ve applied your foundation and concealer but before you move on to the rest of your makeup. This ensures a smooth and even finish.
The Right Tools
- Use a makeup brush or a powder puff to apply setting powder. Brushes are excellent for a lighter application, while puffs can provide more coverage.
The Application Technique
- Dip your brush or puff into the setting powder.
- Gently tap off any excess to avoid over-powdering.
- In a pressing or rolling motion, apply the powder to your skin. Start with your T-zone, where most shine occurs, and work outward.
Set Your Under-Eye Concealer
- For under-eye concealer, use a smaller brush or puff to set the area gently. This prevents creasing and keeps your under-eye area looking bright.
Avoid Over-Powdering
- Remember, less is often more with setting powder. Over-powdering can lead to a cakey or dry appearance, so start with a light application and build as needed.
5. Blush and Bronzer: Adding Dimension
Blush and bronzer are a dynamic duo that can transform your makeup from flat to fabulous. “Blush and Bronzer: Adding Dimension” is all about sculpting your face, adding warmth, and achieving that radiant glow.
In this comprehensive guide, we’ll explore the world of blush and bronzer, helping you choose the right shades, apply them flawlessly, and elevate your makeup game. Get ready to add depth and dimension to your beautiful face. The Magic of Blush and Bronzer
What is Blush?
- Blush is a makeup product designed to add a flush of colour to your cheeks. It comes in various shades, from soft pinks to vibrant corals, to suit different skin tones and makeup looks.
What is Bronzer?
- Bronzer, on the other hand, is used to add warmth and a sun-kissed glow to your complexion. It often has a matte or shimmer finish and comes in shades that mimic a natural tan.
Why Use Blush and Bronzer?
Blush and bronzer can:
- Add Dimension: They help define your face and create the illusion of higher cheekbones and a slimmer nose.
- Brighten Your Look: Blush adds a healthy flush, while bronzer brings warmth and radiance.
- Balance Your Makeup: They complement your eyeshadow and lipstick, completing your makeup look.
- Choosing the Right Blush and Bronzer
- Consider Your Skin Tone
- The key to choosing the right blush and bronzer shades is to consider your skin tone:
- Fair Skin: Soft pinks and light peachy blushes work well. Choose a light bronzer with a neutral undertone.
- Medium Skin: Coral, rosy, or apricot blushes add a pop of colour. Opt for a bronzer with warm undertones.
- Dark Skin: Deep plums or berries for blush and rich, warm bronzers enhance your complexion.
Texture Matters
- Blush and bronzer come in various textures, including powder, cream, and liquid. Choose what works best for your skin type and desired finish.
Shimmer or Matte?
- Blushes and bronzers can have a matte or shimmer finish. Matte options are excellent for a natural look, while shimmer adds a radiant glow. Consider the occasion and your style when choosing.
Applying Blush and Bronzer Effectively
The Right Tools
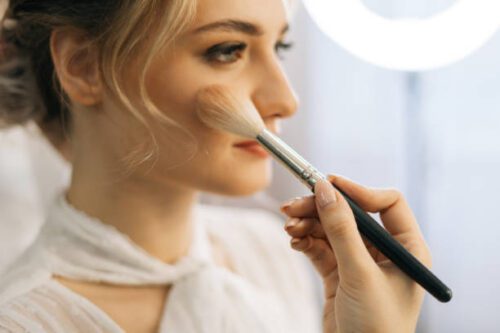
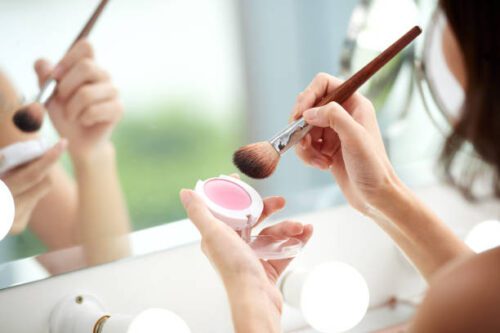
- For powder blush and bronzer, use a soft, fluffy brush. For creams or liquids, opt for a makeup sponge or your fingertips for a seamless blend.
Blush Application
- Smile to find the apples of your cheeks.
- Apply blush with light strokes on the apples, blending gently toward your temples.
- Build colour gradually for your desired intensity.
Bronzer Application
- Apply bronzer to areas where the sun naturally hits: the high points of your face, like the forehead, cheekbones, and jawline.
- Use a light hand and blend well to avoid harsh lines.
Blending is Key
- Blend both blush and bronzer well to ensure a seamless, natural finish. Use a clean brush or sponge for any necessary blending.
- Sh to the apples of your cheeks for a natural flush. Use a light hand with bronzer to avoid looking overly sculpted.
6. Eyeshadow Palette: Mastering Eye Makeup
Your eyes are the canvas, and eyeshadow palettes are your artistic tools. “Eyeshadow Palette: Mastering Eye Makeup” is your gateway to creating mesmerizing eye looks. In this comprehensive guide, we will delve into the world of eyeshadow palettes, teaching you how to choose the perfect palette, blend colours seamlessly, and master the art of eye makeup. Get ready to captivate with your stunning eye looks.
The Power of Eyeshadow Palettes
What is an Eyeshadow Palette?
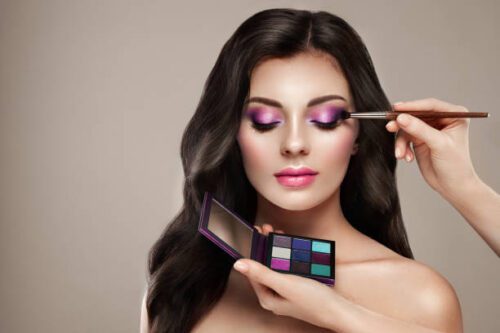
An eyeshadow palette is a collection of coordinated eyeshadow shades, ranging from neutrals to bold and vibrant colours. These palettes offer endless possibilities for creating various eye makeup looks.
Why Use Eyeshadow?
Eyeshadow is a versatile makeup product that can:
- Enhance Eye Shape: It can make your eyes appear larger, more lifted, or create a different shape altogether.
- Add Depth and Dimension: Eyeshadow adds depth to your eyelids, making your eyes pop.
- Express Creativity: With eyeshadow palettes, you can experiment with different colours and styles to express your unique style.
Choosing the Right Eyeshadow Palette
Consider Your Eye Color
The key to choosing the right eyeshadow palette is considering your eye colour:
- Blue Eyes: Earthy tones like browns, coppers, and warm taupes complement blue eyes.
- Green Eyes: Shades like purples, plums, and warm neutrals can enhance green eyes.
- Brown Eyes: Brown eyes can pull off a wide range of colours, from earthy tones to vibrant blues and greens.
Texture and Finish
Eyeshadows come in various textures, including matte, shimmer, and metallic. Consider the finish you want for your look.
Versatility
Look for a palette that offers a mix of matte and shimmer shades. This ensures you can create both everyday and glamorous looks.
Applying Eyeshadow Effectively
The Right Tools
Invest in quality eyeshadow brushes for precise application. Brushes are available for blending, packing colour, and creating defined lines.
Eyeshadow Application
- Start with an eyeshadow primer to create a smooth canvas and prolong eyeshadow wear.
- Apply a transition shade in your crease as a base.
- Build depth by applying a darker shade to the outer corner and crease.
- Use a lighter shade on the lid to brighten your eyes.
- Blend well to create seamless transitions between colours.
- Apply eyeliner and mascara to complete your look.
Experiment and Practice
The key to mastering eyeshadow is practice. Don’t be afraid to experiment with different shades and techniques to discover what suits you best.
7. Eyeliner and Mascara: Defining Your Eyes
Eyes are the windows to the soul, and eyeliner and mascara are the frames that enhance their beauty. “Eyeliner and Mascara: Defining Your Eyes” is your guide to achieving bold, sultry, or natural eye looks.
In this comprehensive guide, we’ll explore the world of eyeliner and mascara, teaching you how to apply eyeliner for various styles and choose the perfect mascara for your lashes. Get ready to define your eyes like a pro.
The Art of Eyeliner and Mascara
What is Eyeliner?
- Eyeliner is a makeup product used to define and accentuate the eyes. It comes in various forms, including pencils, gels, liquids, and pens, and can be used to create a range of looks, from subtle to dramatic.
What is Mascara?
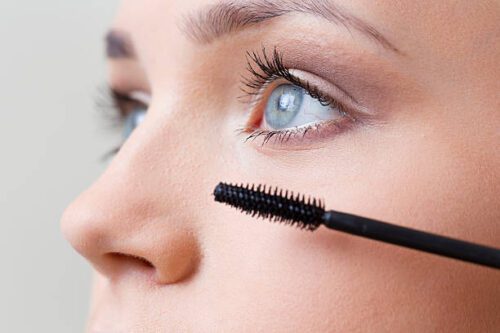
- Mascara is a makeup product applied to the lashes to lengthen, volumize, and darken them. It enhances the eyes by making the lashes appear longer and more defined.
Why Use Eyeliner and Mascara?
- Eyeliner and mascara can:
- Define the Eyes: Eyeliner adds definition to the lash line, while mascara makes lashes stand out.
- Create Different Looks: They can be used to create classic, winged, or smoky eye looks.
- Open Up the Eyes: By defining the eyes, they make them appear larger and more captivating.
- Applying Eyeliner Like a Pro
- The Right Eyeliner Type
- Choose the right eyeliner type for your desired look:
- Pencil Eyeliner: Great for a soft, smudged look.
- Liquid Eyeliner: Ideal for precise lines and dramatic winged looks.
- Gel Eyeliner: Offers versatility for various styles.
- Eyeliner Application
- Start by priming your eyelids to create a smooth canvas.
- Use short, controlled strokes to apply eyeliner along the lash line.
- Experiment with different styles, like tightening (lining the upper waterline) or creating a wing.
Practice Makes Perfect
- Don’t be discouraged if you don’t get it perfect on the first try. Practice and experimentation are key to mastering eyeliner application.
- Choosing the Perfect Mascara
- Consider Your Lash Type
- Consider your lash type when choosing mascara:
- Lengthening: For shorter lashes.
- Volumizing: For sparse lashes.
- Waterproof: For all-day wear and smudge-proof results.
Brush Shape Matters
- Mascara brushes come in various shapes, from curved to straight. Choose a brush that suits your lash type and desired effect.
Layering Mascara
- You can layer different mascaras for a customized effect. For example, start with a lengthening mascara and finish with a volumizing one.
- Eyeliner and mascara are your allies in defining your eyes and making them the focal point of your makeup. By choosing the right eyeliner type, practising application techniques, and selecting the perfect mascara for your lashes, you can achieve a variety of eye-catching looks, from subtle to bold.
- Whether you’re preparing for a special occasion or just want to enhance your everyday look, mastering the art of eyeliner and mascara will help you define your eyes like a pro and leave a lasting impression.
8. Lipstick or Lip Gloss: The Perfect Pout
Your lips are your canvas, and lipstick or lip gloss is your palette. “Lipstick or Lip Gloss: The Perfect Pout” is your guide to creating kissable, vibrant lips.
In this comprehensive guide, we’ll explore the world of lip colour, teaching you how to choose the right shade, apply it flawlessly, and make your lips the centre of attention. Get ready to perfect your pout.
The Magic of Lipstick and Lip Gloss
What is Lipstick?
- Lipstick is a makeup product that adds colour and texture to the lips. It comes in various finishes, including matte, satin, and gloss, and offers a wide range of shades to suit different skin tones and styles.
What is Lip Gloss?
- Lip gloss is a glossy, often sheer, lip product that enhances the natural colour of your lips while adding shine. It’s known for its moisturizing and light-reflecting properties.
Why Use Lipstick and Lip Gloss?
- Lipstick and lip gloss can:
- Enhance Lip Color: They add vibrancy and depth to your lips, making them more captivating.
- Boost Confidence: A pop of colour on the lips can boost your confidence and complete your look.
- Hydrate and Shine: Lip gloss provides hydration and a lustrous shine for a youthful appearance.
Choosing the Right Lip Color
Consider Your Skin Tone
The key to choosing the right lip colour is considering your skin tone:
- Fair Skin: Soft pinks, light corals, and nude shades complement fair skin.
- Medium Skin: Bold reds, warm mauves, and deep pinks enhance medium skin tones.
- Dark Skin: Rich plums, deep reds, and vibrant oranges pop against dark skin tones.
Matte vs. Glossy
Choose between matte and glossy finishes based on your preference and the occasion. Matte lipsticks offer a sophisticated, velvety finish, while lip gloss provides a shiny, youthful look.
Longevity
Consider the longevity you need. Matte lipsticks often last longer, while lip gloss may require more frequent touch-ups.
Applying Lipstick and Lip Gloss Effectively
Lip Prep
Start with smooth, hydrated lips. Exfoliate if needed and apply a lip balm before applying lip colour.
Lip Liner
Lip liners can define your lips and prevent feathering. Choose a liner that matches your lip colour or the lipstick shade.
Application Techniques
Lipstick:
- Start at the centre of your lips and work outward.
- Use a lip brush for precision or apply directly from the tube.
- Blot with tissue for a matte finish or leave it as is for a glossy look.
Lip Gloss:
- Apply lip gloss to the centre of your lips and spread it outward.
- Use a lip brush or your fingertip for a controlled application.
- Layer for added shine or apply a thin coat for a more subtle effect.
The Blotting Trick
For a longer-lasting lip colour, apply lipstick, blot with a tissue, and reapply. This sets the colour and reduces transfer.
Conclusion-:
In conclusion, embarking on your makeup journey as a beginner should be a thrilling adventure, not a daunting task. These must-have makeup products are your trusted companions on this beauty expedition. From the perfect primer to the magic of mascara, you’ve got the essentials to create stunning looks that enhance your natural charm.
Remember, makeup is an art form, and practice makes perfect. So, don’t hesitate to experiment, try new things, and most importantly, have fun with it! As you become more confident in your skills, you can explore a world of colours, textures, and styles. But for now, these fundamental products will serve as your foundation for makeup mastery.
So, go ahead, embrace your inner makeup artist, and let your creativity shine. Whether it’s a fresh-faced natural look or a bold, dramatic transformation, these products are your secret weapons to feeling confident, beautiful, and ready to conquer the world. Enjoy your makeup journey, and may it be filled with endless moments of beauty and self-expression.

